
I had this crazy idea several years ago. Wouldn’t it be a fun Disney craft to take those bus flags from the 80s/90s and make physical replicas of them? Not sure what I’m talking about? Let’s take a few steps back.
In the beginning….
Nope, too far back. In the early days of Walt Disney World, your vacation options were pretty limited. Magic Kingdom was the only park open. Just a small number of resorts were built, and it was all connected by one monorail, one ferry, and a bus or two. Simple, easy.
Then they built more stuff!
Over the years, Disney World began expanding. A shopping village was constructed. EPCOT opened. A new water park, Typhoon Lagoon opened. With the opening of Disney MGM Studios and the new Caribbean Beach Resort, Disney found itself with a more complicated transportation situation. There were a number of places guests could go, from a number of places around the property.
More places, more buses.
So with all of these destinations around Walt Disney World, and an expanding network of buses to all of them, how will guests know which bus to board? Surely it’s going to be a pain to think you’re going to Epcot, hop on the first bus that arrives, and end up at the Disney Shopping Village.
We need flags!
To ease guest confusion, and because LED signs on buses weren’t invented yet, Disney created a system of colored flags to help identify to guests where each bus is going. Not sure what bus you need? Grab a handy reference guide at any bus stop!
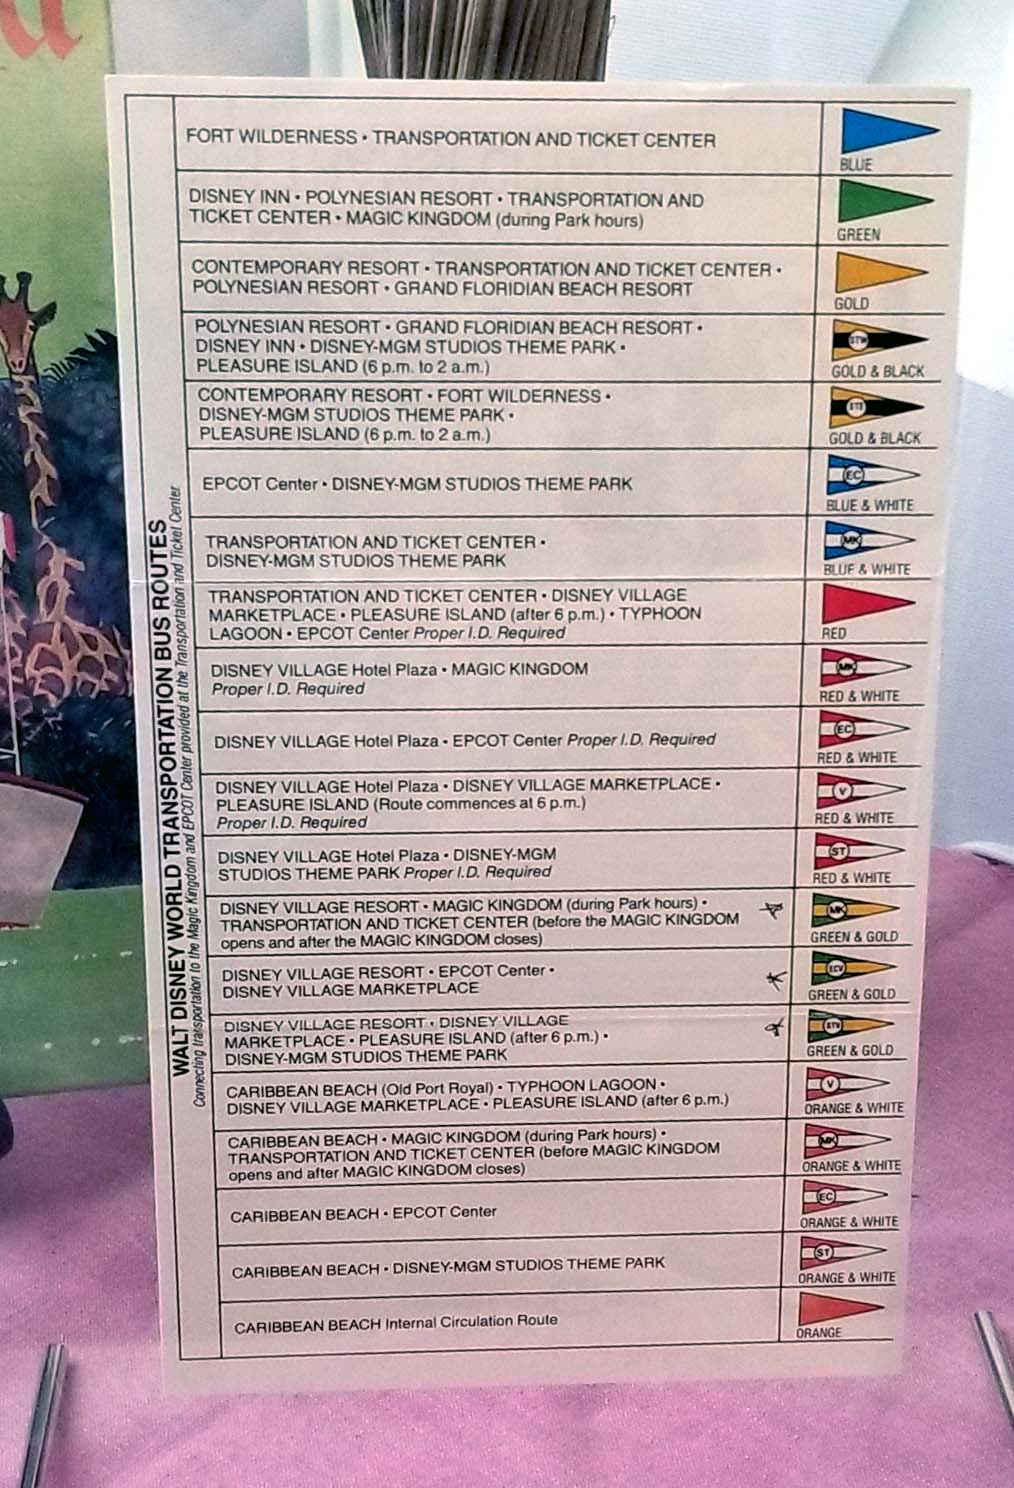
Now you can easily determine what bus to watch for to get where you need to go. Just keep an eye on the letters on the flag, though! You want the ST flag to get to MGM Studios; the EC flag will take you to Epcot!
I thought it would be a fun project to turn those 2D flags from the guides into replica flags. Let’s head to the craft store for supplies!
A craft project begins!
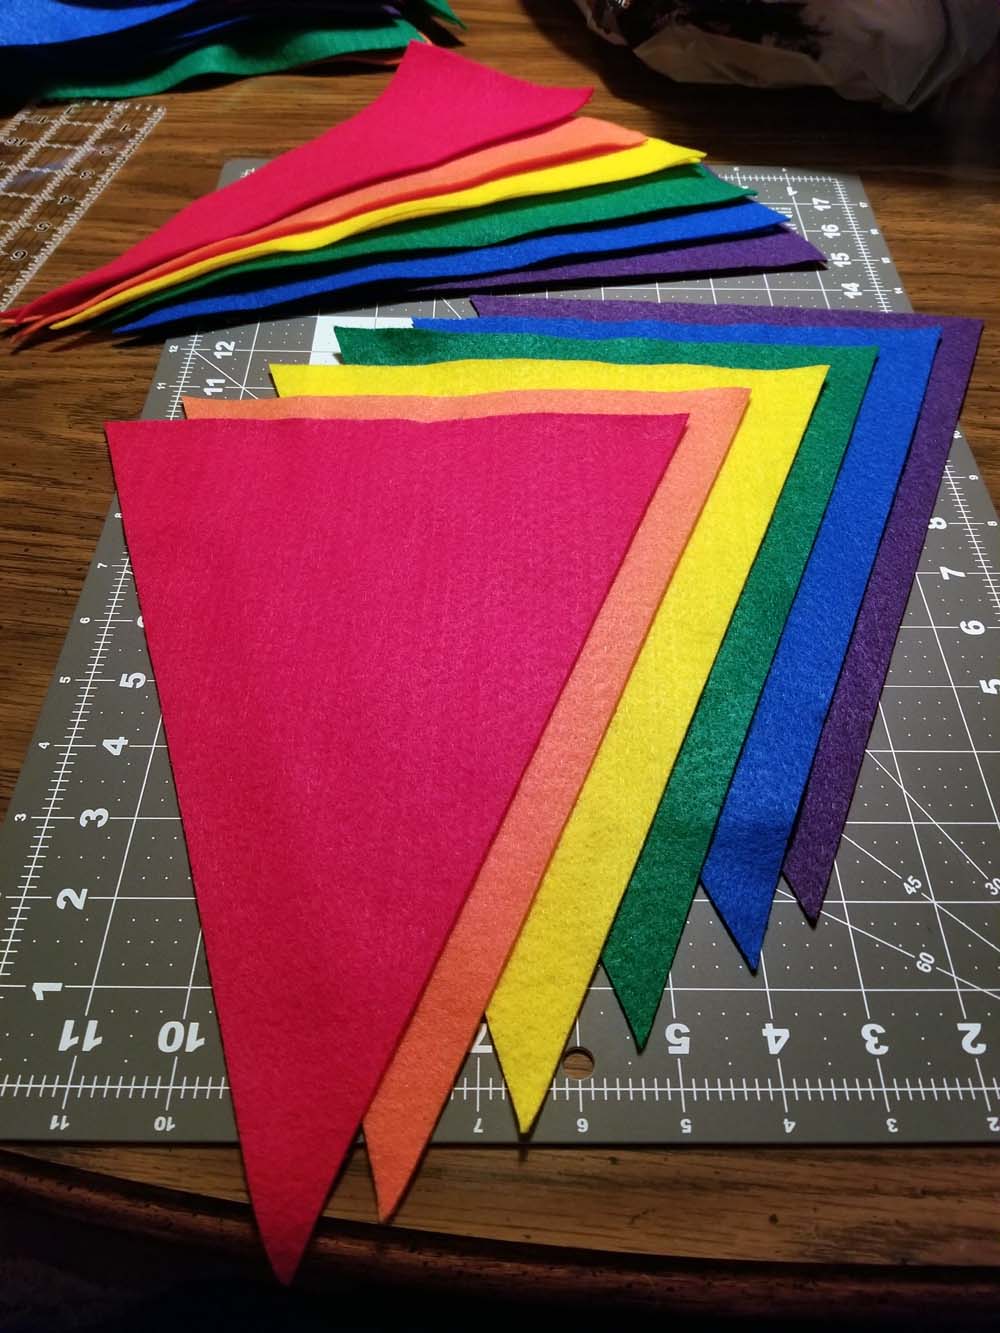
One shopping cart of supplies later, we can begin this project! All we have to do now is take all of those felt rectangles and cut them into pennants. Easy, right? There’s only 20 flags to make. This 20 is going to haunt me later.
Solid flags: done!
After cutting several of the solid color felt rectangles into pennants, and including some of the Fort Wilderness bus routes for extra pizzaz, I’m feeling pretty confident! Look at that: we’re already a quarter of the way finished!
The fancy flags though….
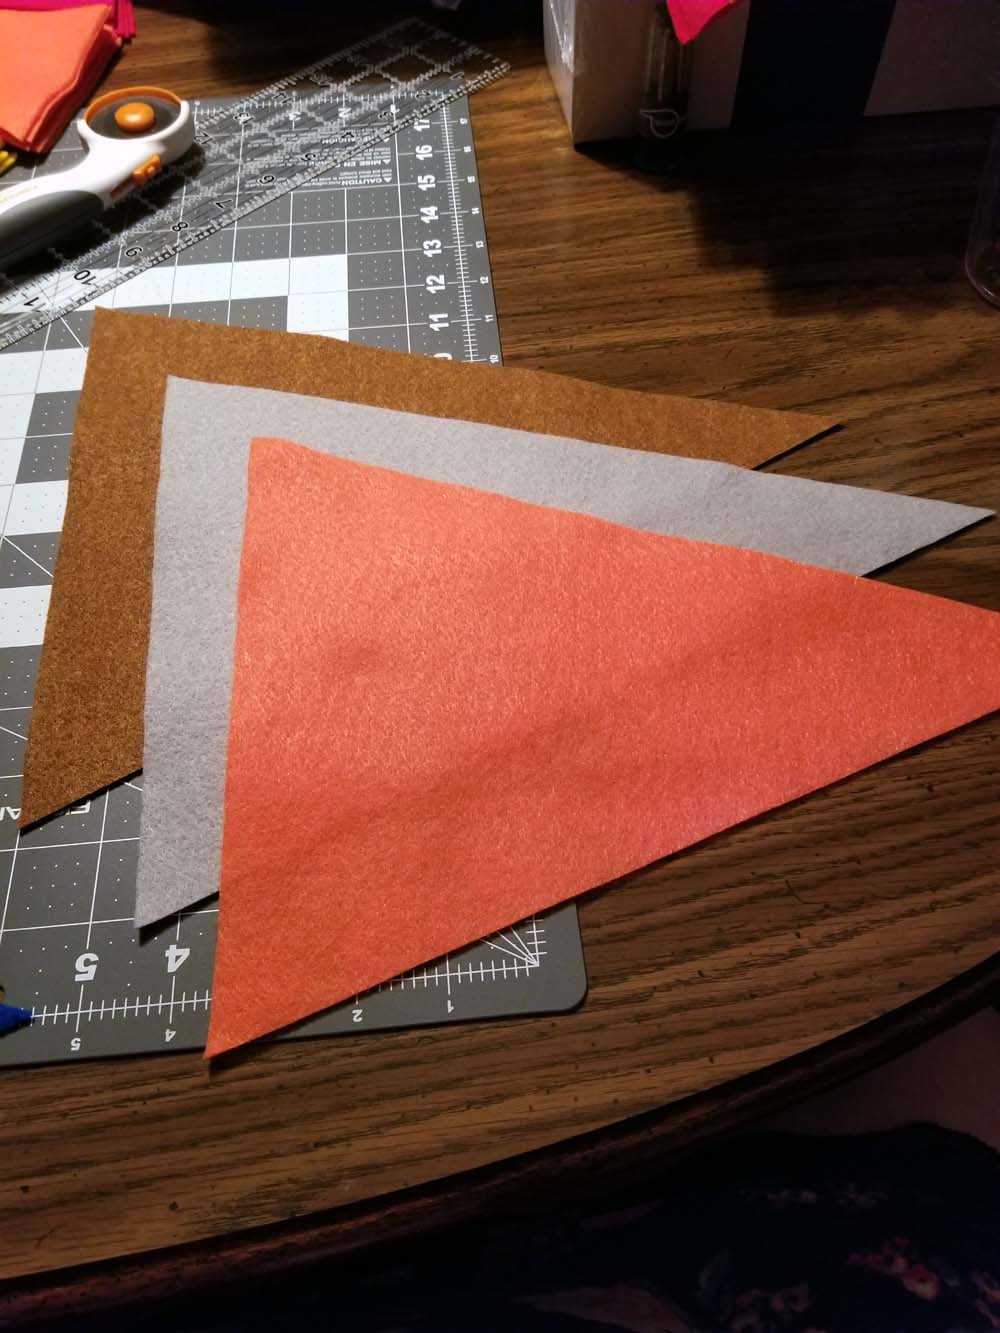
But now the remaining flags are 2-tone, so I have to cut more felt for the contrasting colors. In addition, there’s a bit of a learning curve for measuring and cutting these smaller triangles. They can’t be too small or too large, or it won’t look right. Back to the craft store for more felt.
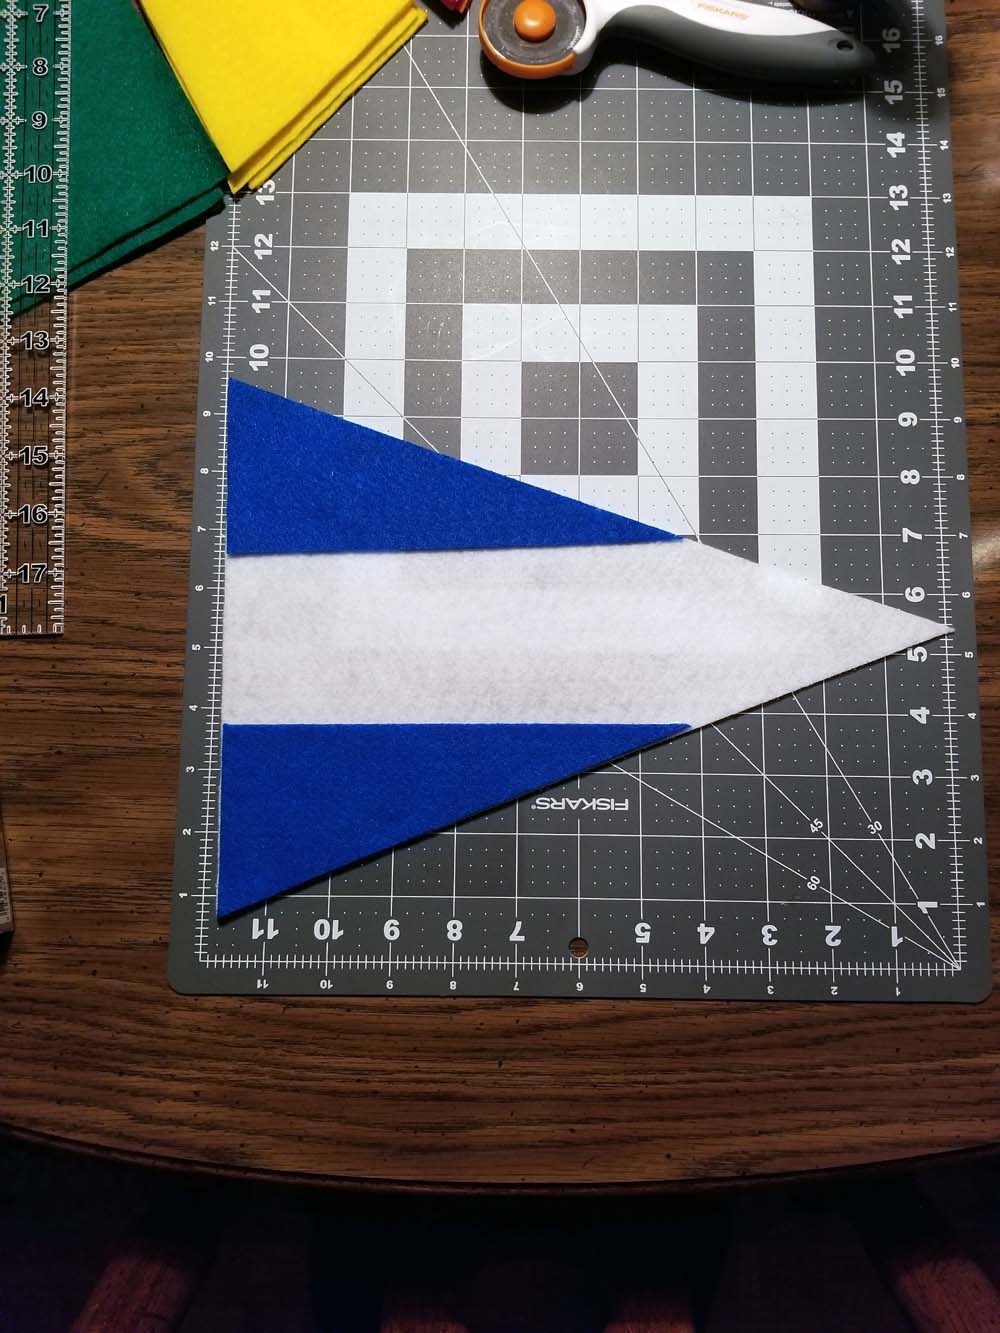
Crafting woes.
It’s around this part of the project where I learned that these flags aren’t going to be 100% perfect. Do I aim for precision at the expense of time, or do I aim for completion at the expense of precision? I mean, it’s a personal craft project so it’s not expected to be perfect, right?
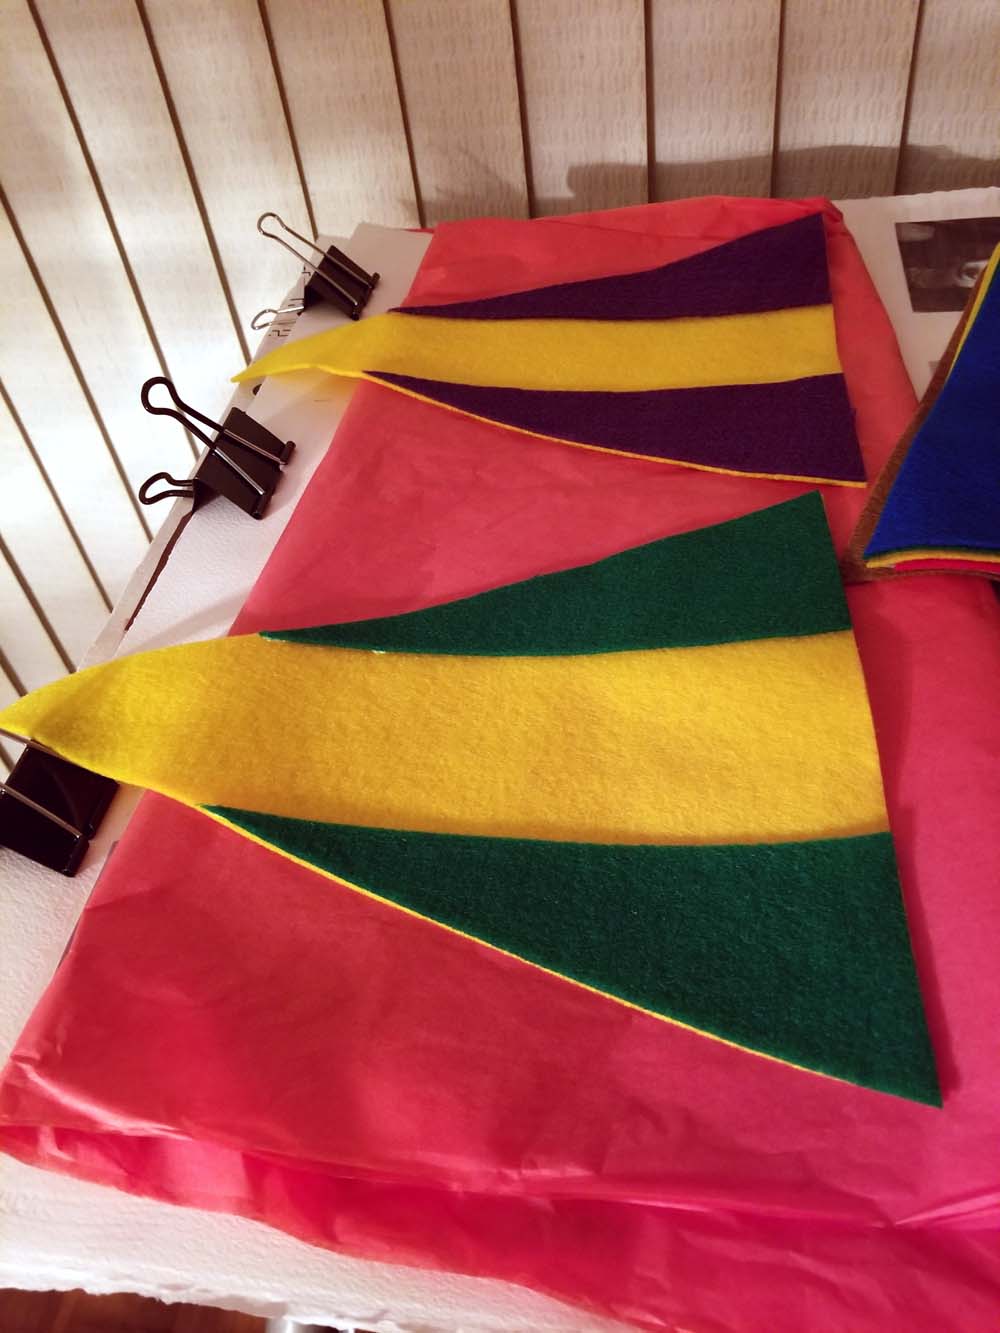
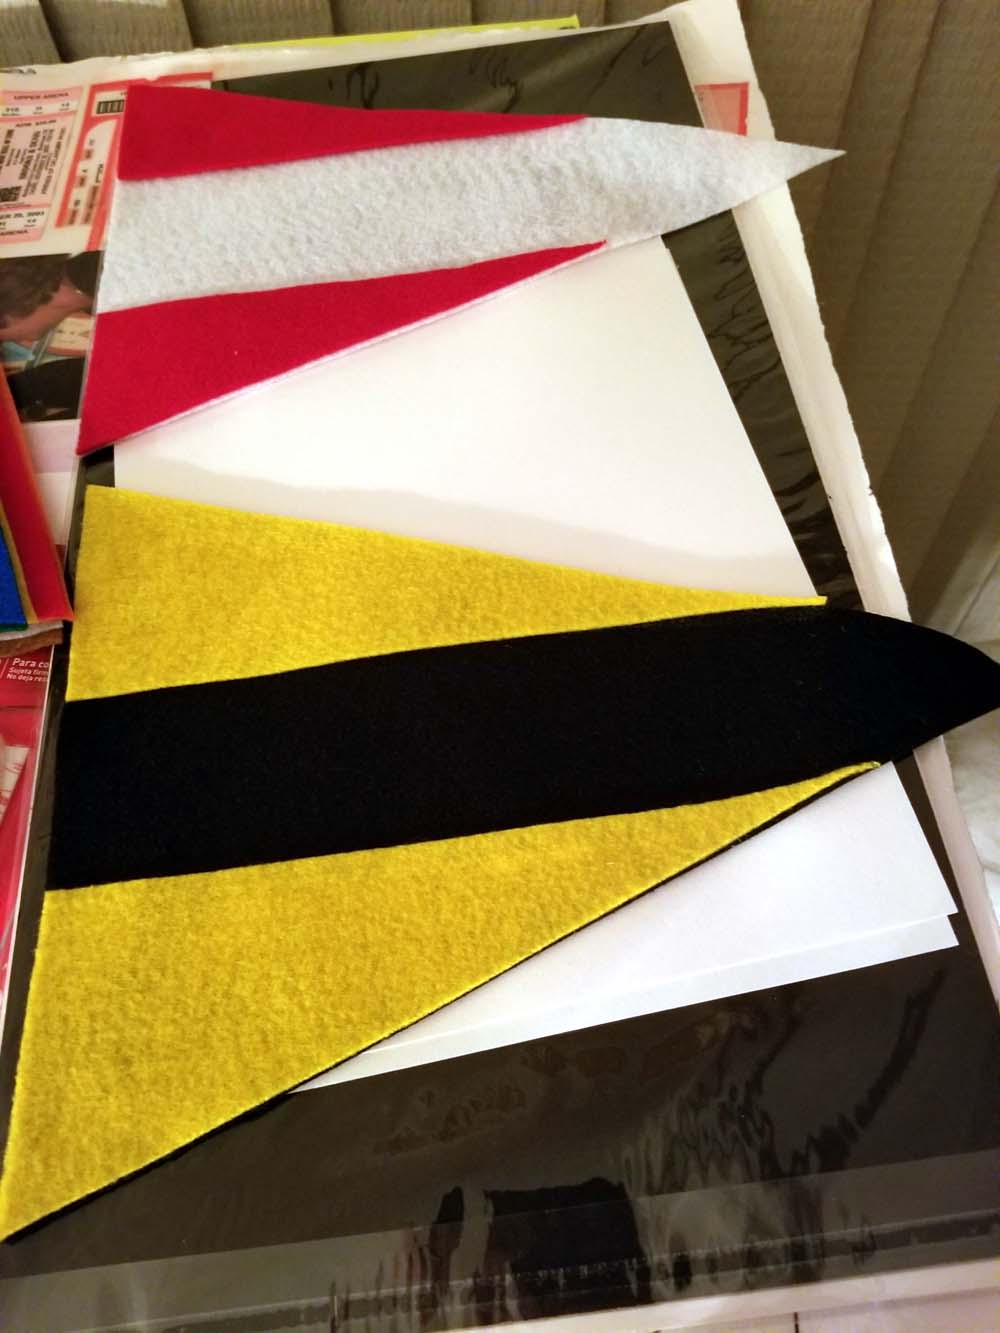
It was also around this time of the craft project when I was made painfully aware of how much space these flags will need, at least temporarily. Once the alternate color triangles were cut, they were then fabric glued onto the main color. I didn’t want to stack the flags on top of each other and risk having them glue themselves together, so I had to find room around the house to dry 15 flags. It wasn’t easy.
The lettering fiasco.
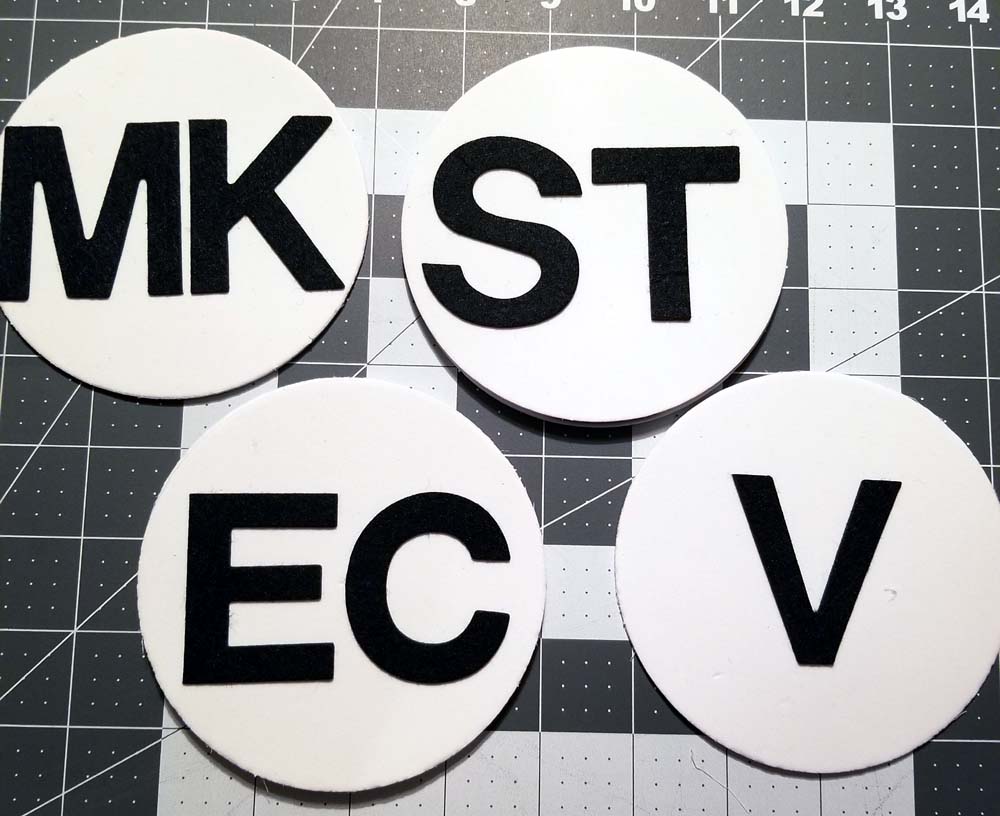
This was an expensive lesson. Knowing I’m terrible at cutting circles, I searched around the craft store for anything white and circular. Felt circles would have been obvious, but they weren’t large enough for this project.
Worried this project would end at the halfway point, I noticed a package of sports balls printed on foam. Footballs, basketballs, baseballs, and soccer balls. What if I turned the white foam pieces around and used the back side? It’s genius! But, one package wouldn’t be enough. I was going to need a few more packages. We’ll have to return next week when they restock.
I also found felt adhesive letters. Opening up the package, I searched around to find a size large enough to fit on the foam circles, while also giving me enough room for those flags that need 2 letters. Those 3-letter flags will have to go without for now. Once at home, I also learned that this adhesive letter company only gives you a lot of some letters, and only a few of other letters. Letters that I need. Back to the craft store I go. Again.
It’s coming together!

After hours of cutting and gluing, searching and shopping, the WDW Bus Flag craft project is starting to come together! I put letters onto the backside of the foam circles, and once the flags were dry, I glued the foam circle onto each flag. Now we wait again for everything to dry.
They’re not perfect, but I love ’em.

They look so great! Sure, they’re not perfect, but I think they turned out so well! Of course being so involved in the process, I’m going to see every small detail where this is crooked, or this triangle is too short. But overall, I’m happy with how they all turned out.
My only problem now is: what do I do with them? That is a question I haven’t answered yet. I made them. I have them. But now I don’t know what to do with them. I could hang them up, but that seems a little cheesy. I could frame them, but I don’t have any wall space. So now I have this craft project that is finally all done, and no idea what to do with it.
I’ll figure out something to do with them eventually. Any ideas?